Duplicating A Trip
Just come back from a trip and want to plan the same trip for the future, maybe your annual family get together, or the quarterly meeting with corporate, or just a nice relaxing break by the beach and want to quickly create a copy of the trip, starting with Tripsy 3.8, we've got you covered.
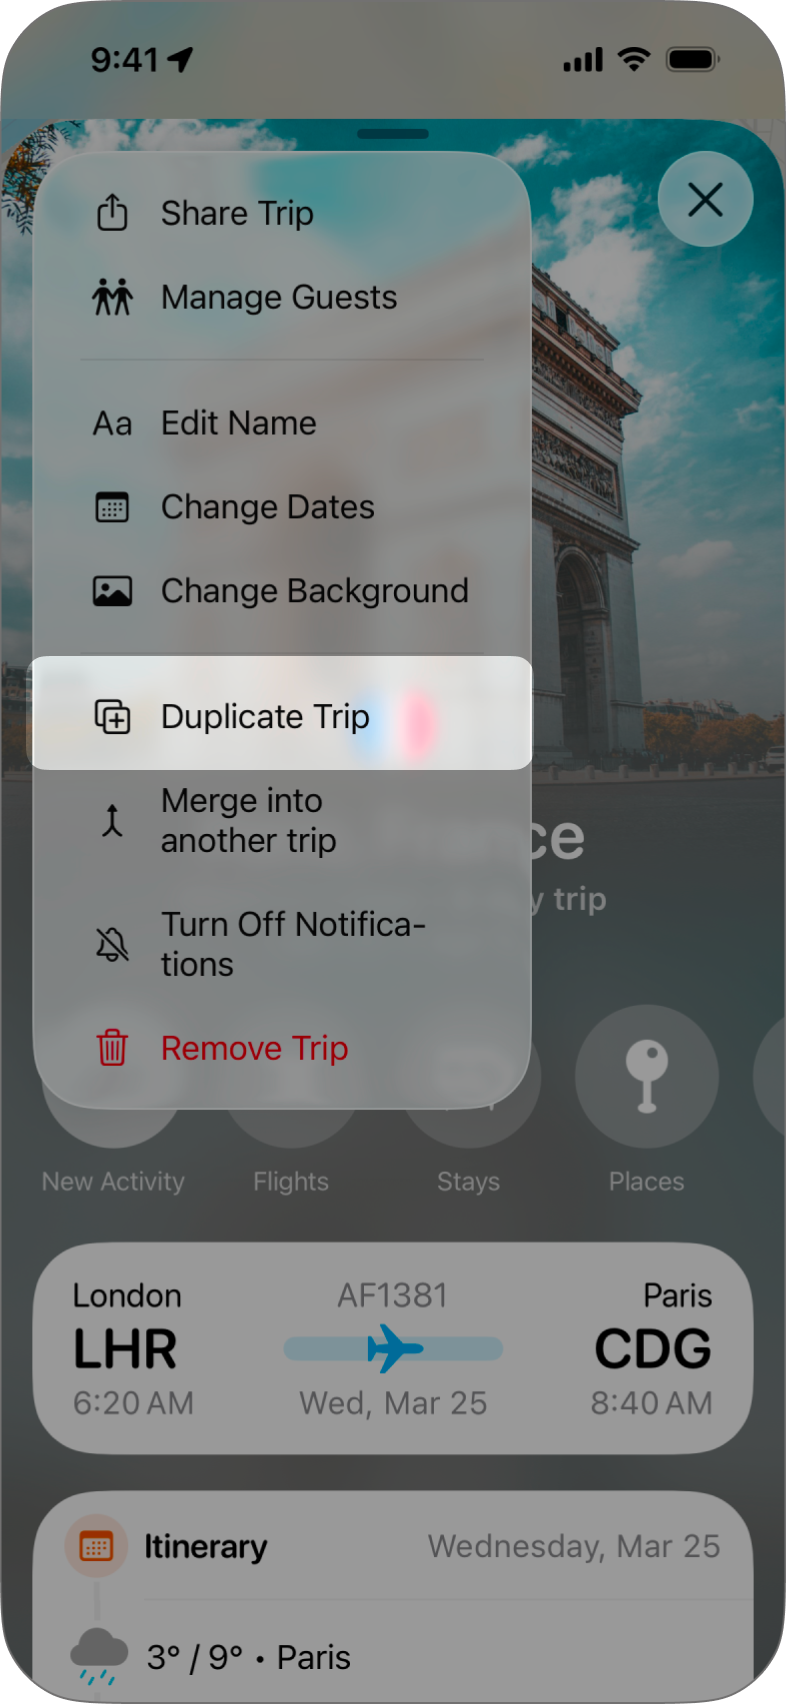
Duplicating a trip starts by accessing the trip's menu via the three dots at the top-left of the trip you want to duplicate, then just tap Duplicate Trip and Tripsy will guide you through the process.
|
|
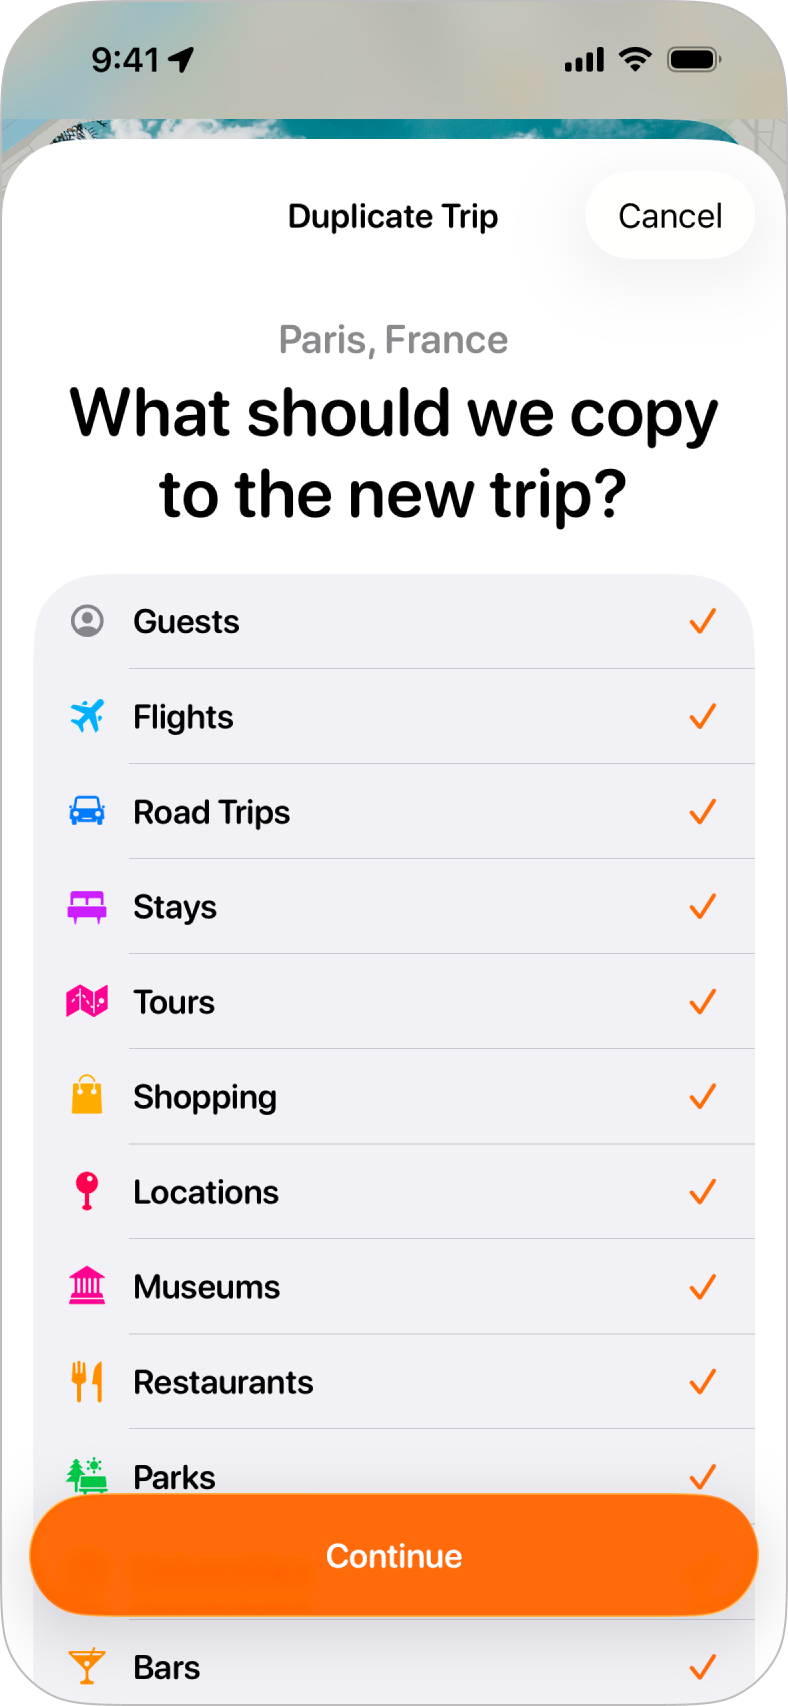
Step 1: Choosing What to CopyWhen you tap on Duplicate Trip from the trip's menu, you'll be shown a list of the elements of the original trip you'd like to copy to the new trip. If you had invited guests to the original trip, or this trip was shared with you, you'll also see an option to select Guests as an option to copy. Once you're happy that you've selected the elements to copy, tap Continue to move on to the next step. |
|
|
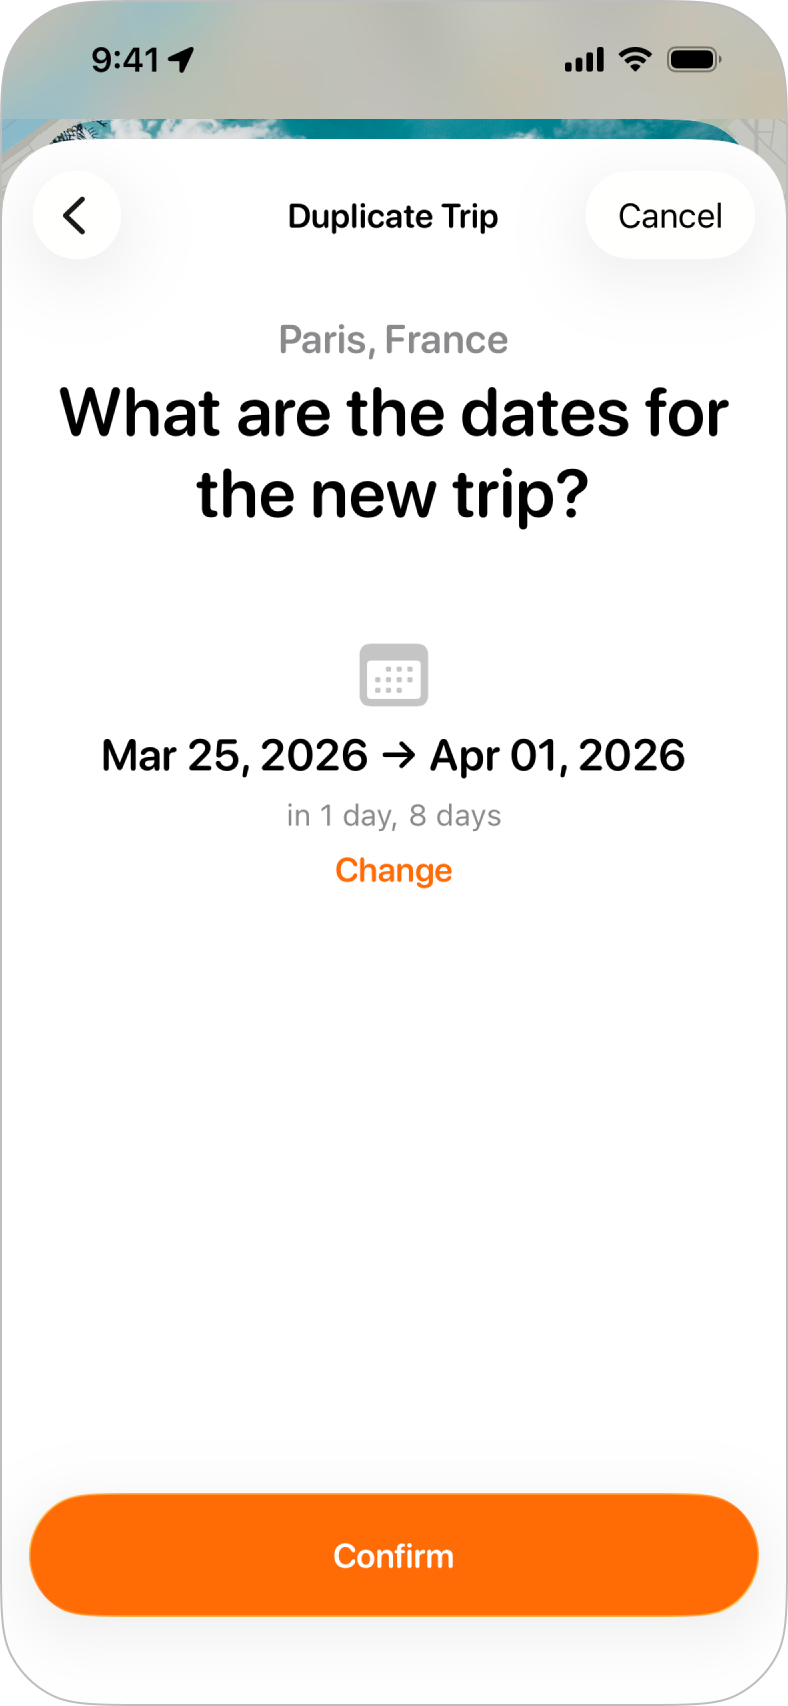
Step 2: Choosing DatesWhen you duplicate a trip, you can choose to keep the existing dates (which you may want to do if you're copying a trip shared by a friend but want to add your own activities that they aren't involved in), or tap Change to set new dates for the trip. |
|
|
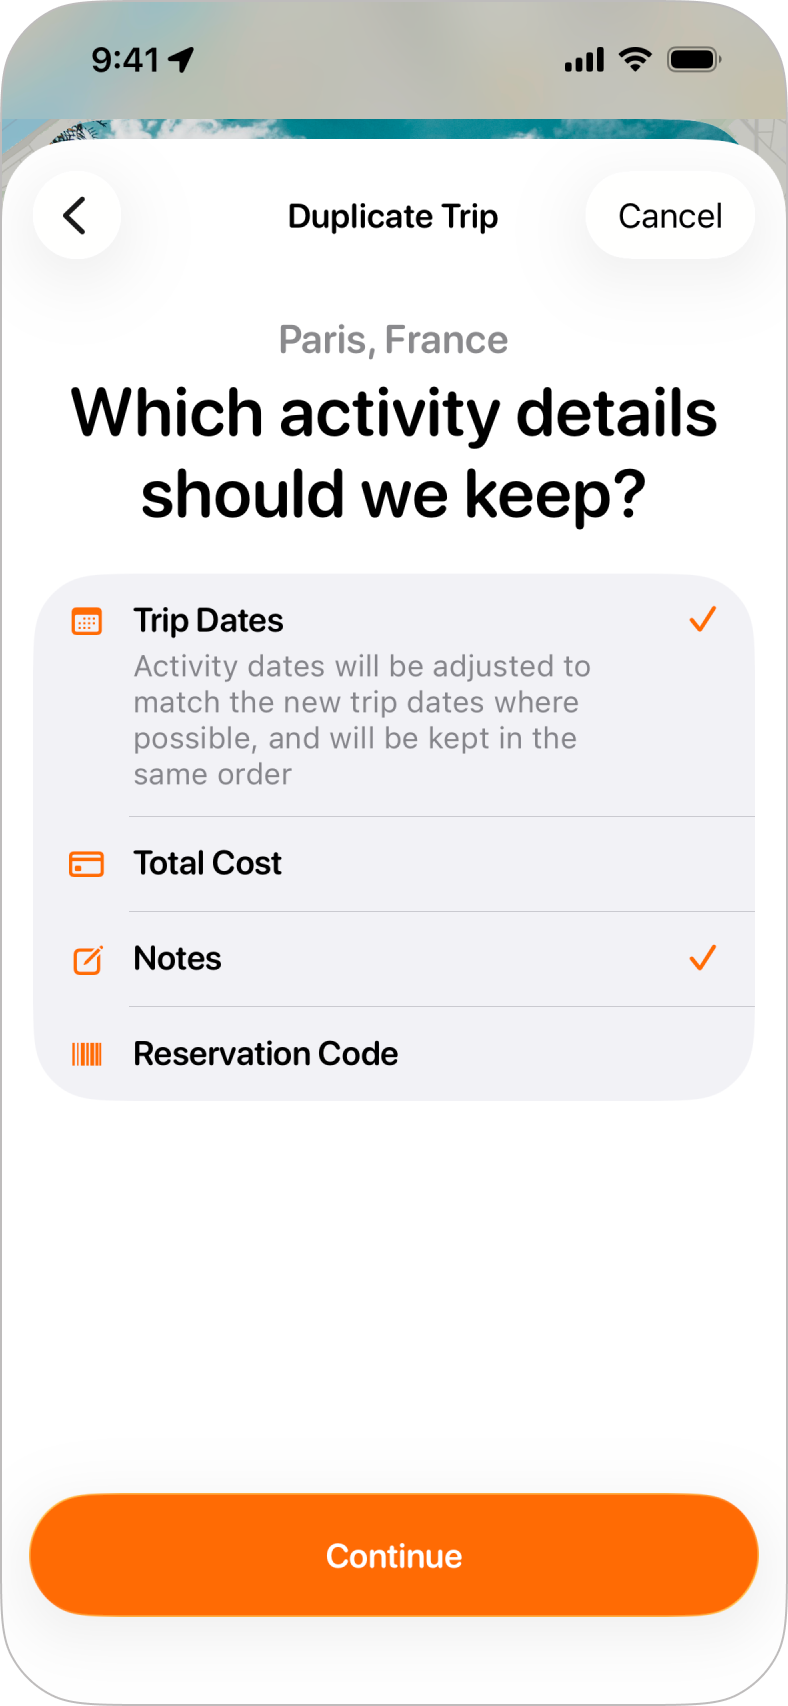
Step 3: Activity Details to KeepYou can now choose which details of the original activities in the trip you're duplicating to keep:
|
|
|
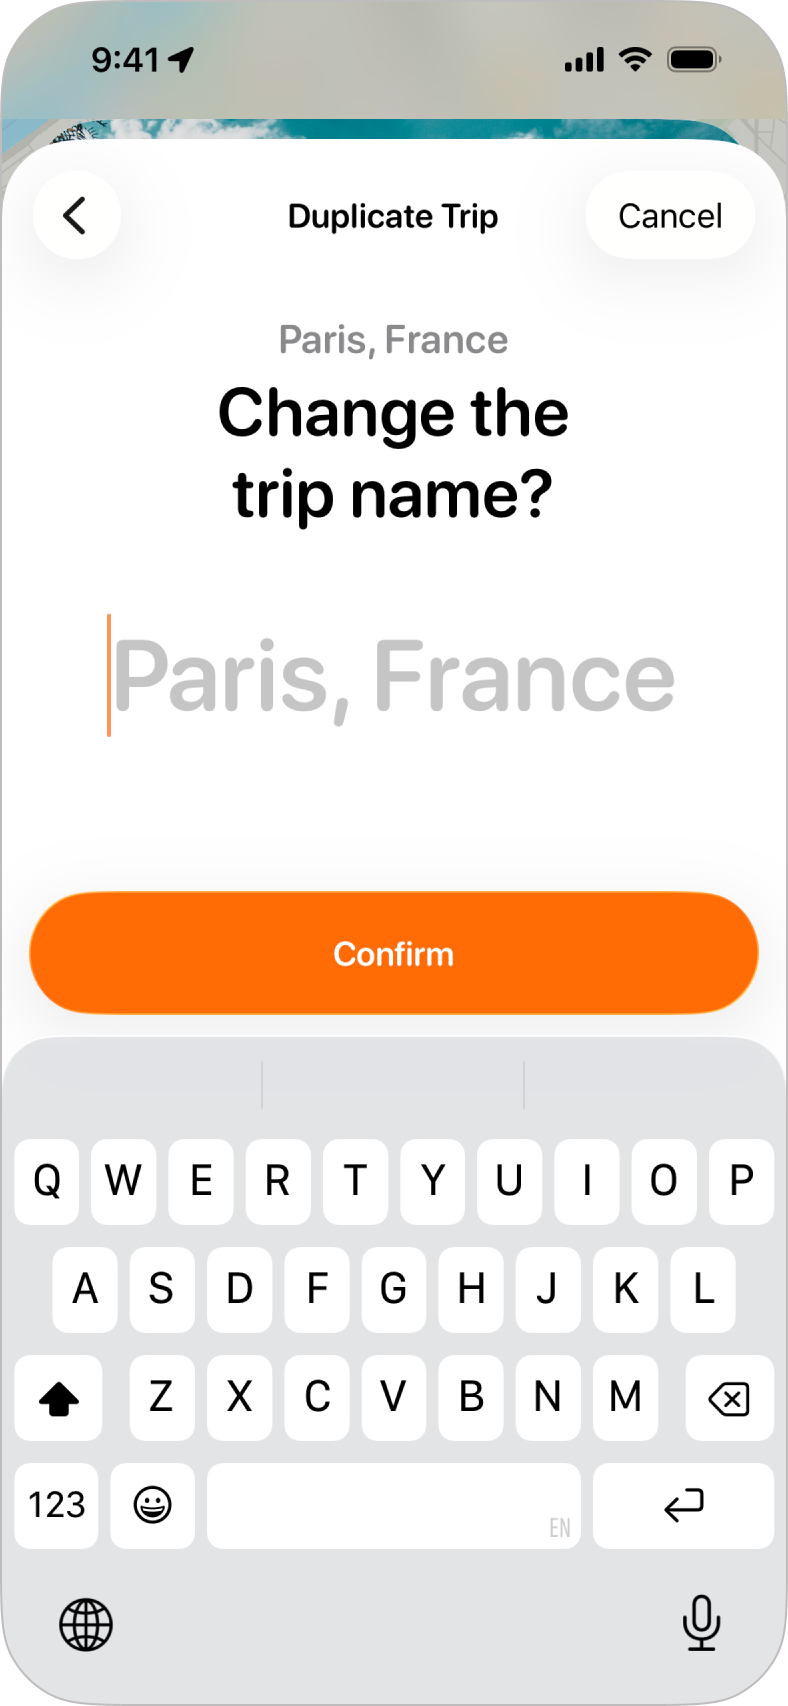
Step 4: Trip NameIf you want to change the name of the trip from the original, you can start typing the new name for your trip. If you don't type anything, the name of the original trip will be used. Tap Confirm once you're happy with the trip's name, |
|
|
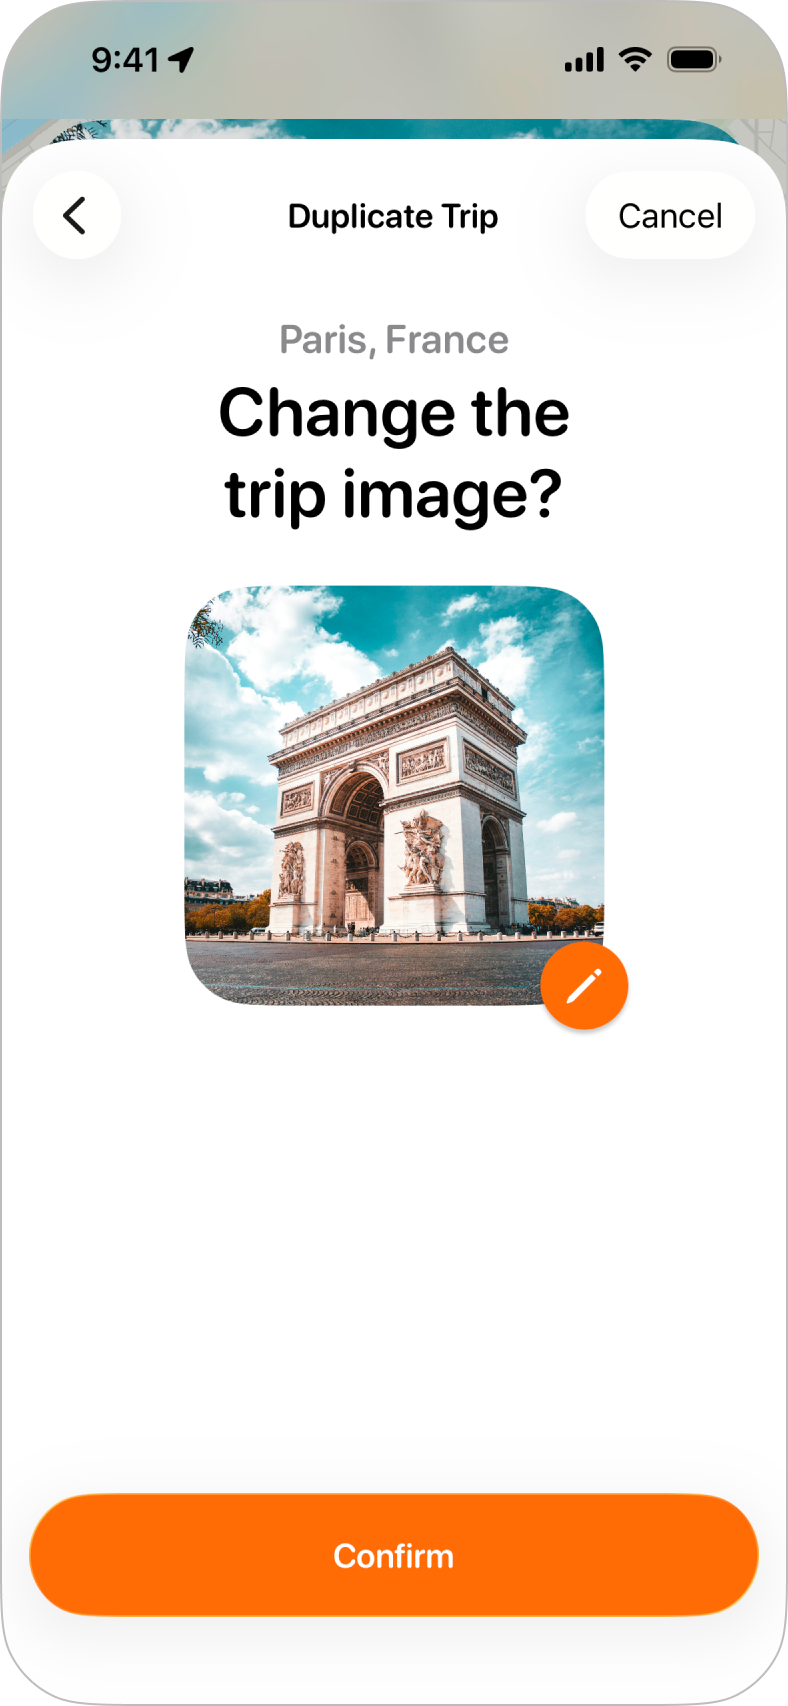
Step 5: Trip ImageTripsy will copy the image for the original trip by default, but tapping the pencil icon at the bottom right of the image will let you choose a new image for the trip. You'll see the same options to choose a new image as you would when changing a trip's background. |
|
|
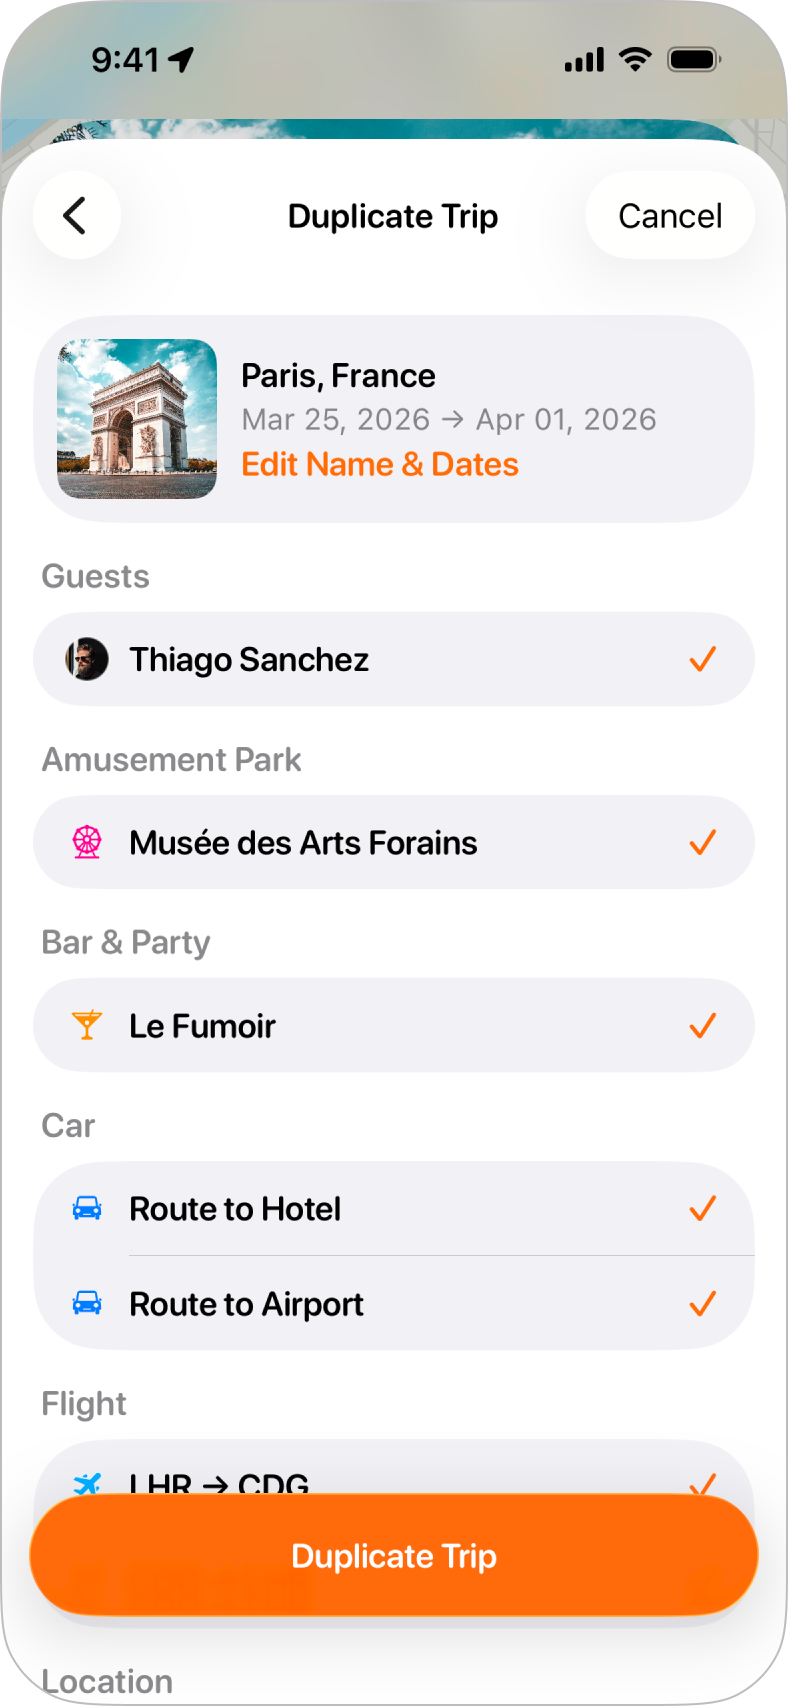
Step 6: Confirming DetailsBefore you tap Duplicate Trip, you can see a full summary of everything that will be duplicated into the new trip. If you don't want certain elements, such as a specific guest or an activity to be duplicated, just uncheck those elements and they will be removed from the new trip for you. That's it, you've duplicated a trip and you should see this along with all your other trips. |